> For the complete documentation index, see [llms.txt](https://docs.rapidproxy.io/llms.txt). Markdown versions of documentation pages are available by appending `.md` to page URLs; this page is available as [Markdown](https://docs.rapidproxy.io/simplified-mandarin/dai-li/ji-cheng-zhi-nan/dong-tai-zhu-zhai-dai-li/foxyproxy.md).
# FoxyProxy
### **步骤 1:登录您的账户**
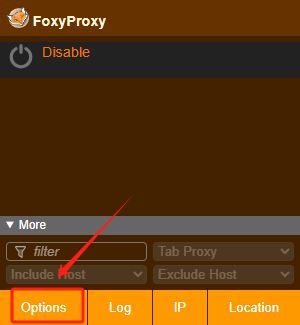
在你的 Chrome 浏览器中打开 FoxyProxy 扩展程序,然后点击**【Options/选项】**进入设置页面。
 ### **步骤 2:创建新的代理配置**
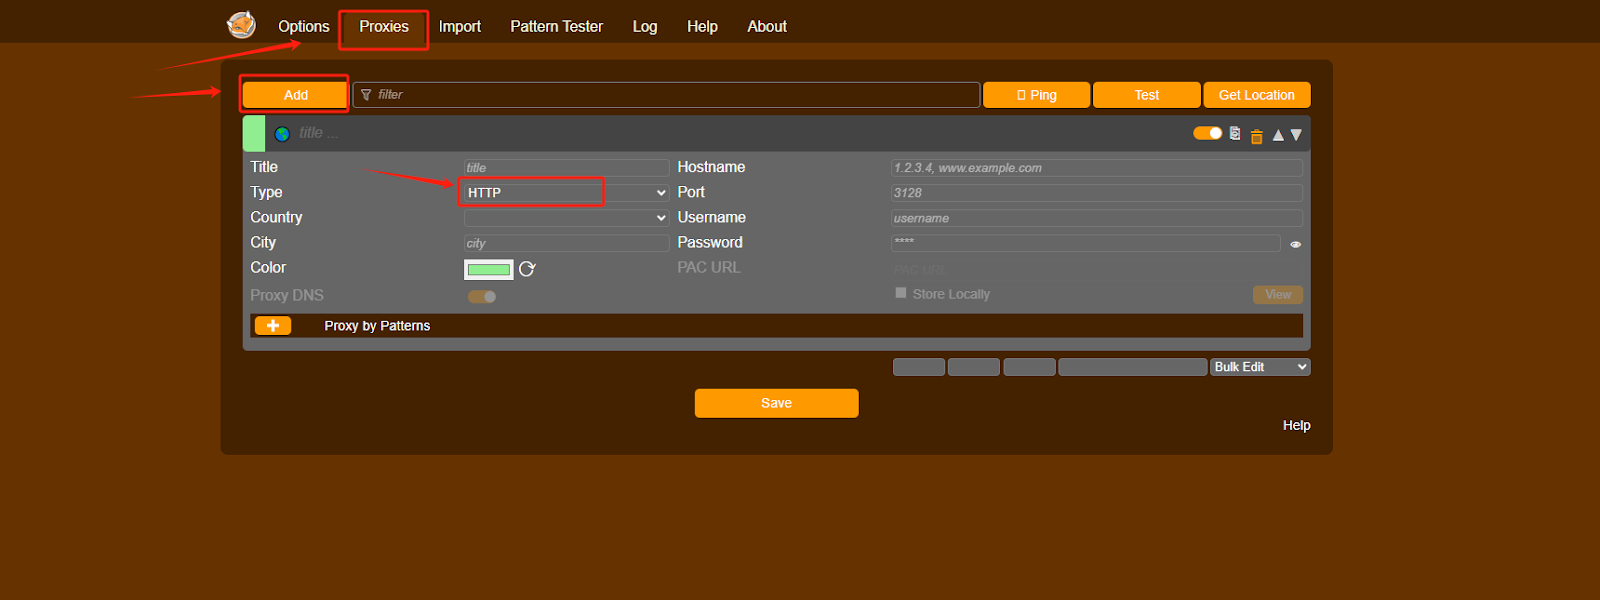
前往 **【Proxies/代理】** 选项卡,点击 **【Add/添加】** 以创建一个新的代理条目。
在弹出窗口中,选择 **【HTTP】** 作为代理类型。
**注意**:本指南以 HTTP 为例。RapidProxy 支持 HTTP (S) & SOCKS5 协议。
### **步骤 2:创建新的代理配置**
前往 **【Proxies/代理】** 选项卡,点击 **【Add/添加】** 以创建一个新的代理条目。
在弹出窗口中,选择 **【HTTP】** 作为代理类型。
**注意**:本指南以 HTTP 为例。RapidProxy 支持 HTTP (S) & SOCKS5 协议。
 ### **步骤 3:输入代理详细信息**
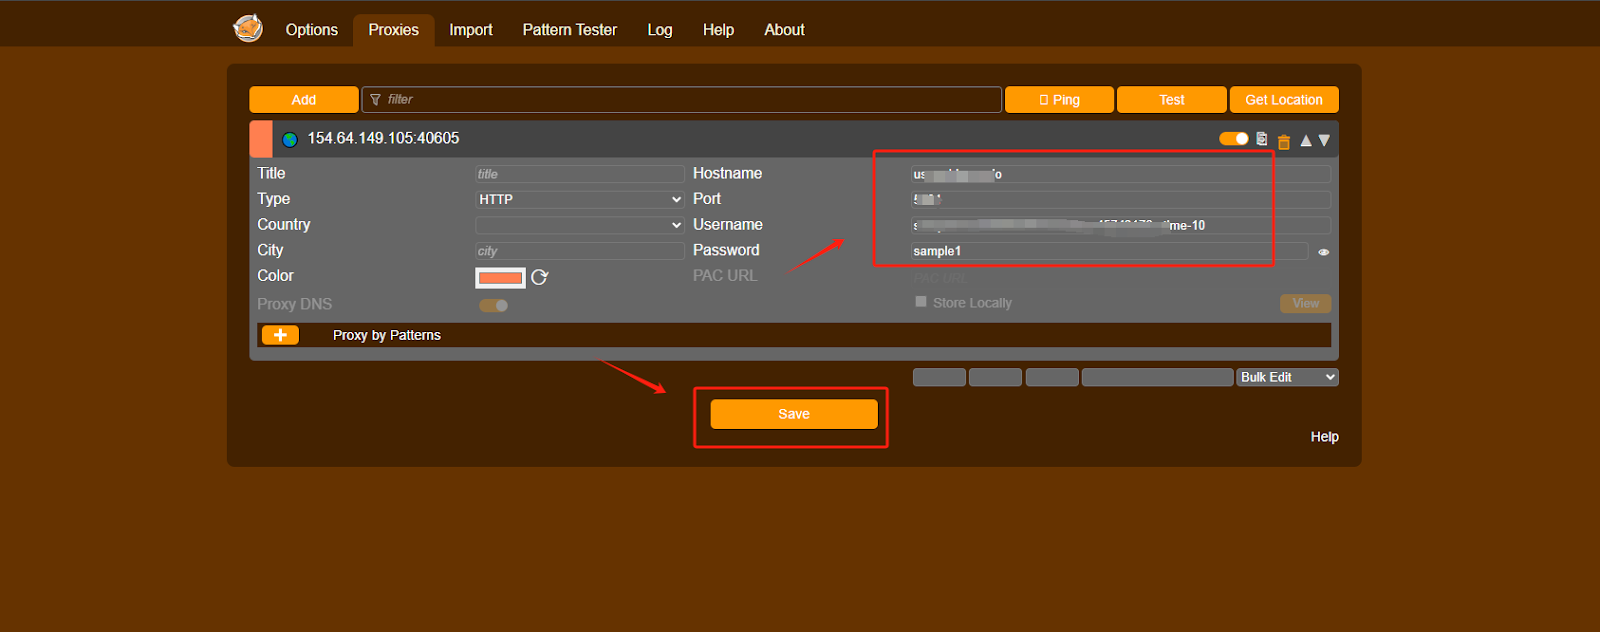
将从 RapidProxy 获取的代理信息(包括 IP、端口、用户名和密码)粘贴到 FoxyProxy 的相应字段中。
完成后,点击 **【Save/保存】** 以存储代理设置。
* 如何获取 RapidProxy 的用户名和密码?
* 如何获取 RapidProxy API 信息?
### **步骤 3:输入代理详细信息**
将从 RapidProxy 获取的代理信息(包括 IP、端口、用户名和密码)粘贴到 FoxyProxy 的相应字段中。
完成后,点击 **【Save/保存】** 以存储代理设置。
* 如何获取 RapidProxy 的用户名和密码?
* 如何获取 RapidProxy API 信息?
 ### **步骤 4:开始使用代理**
返回 FoxyProxy 扩展程序的主界面。
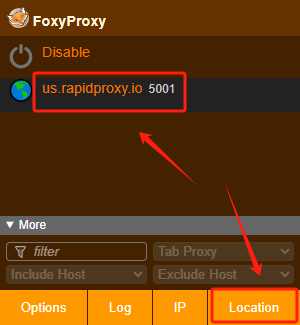
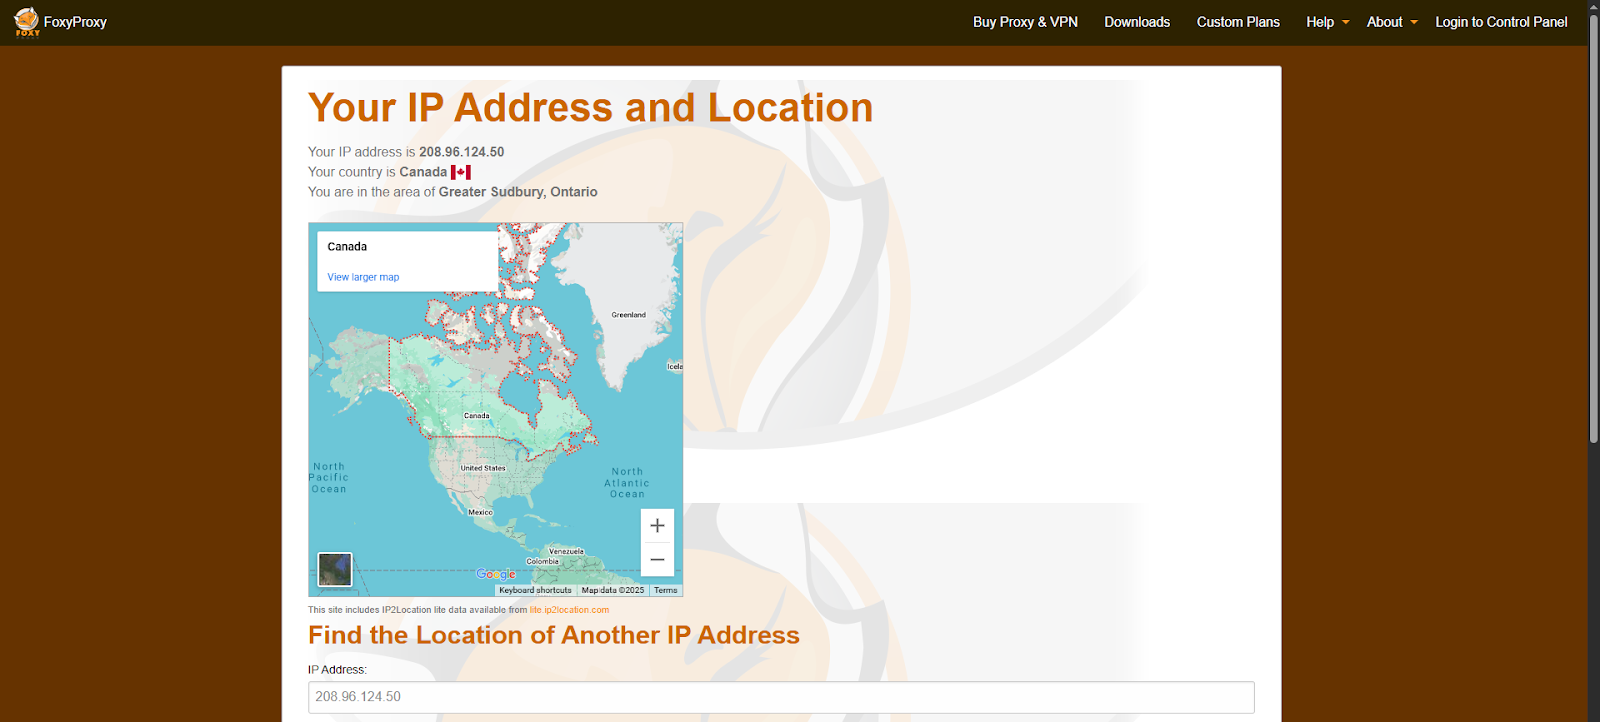
点击您刚刚创建的代理配置文件,然后选择 **【Location/位置】** 以激活已配置的代理环境。
现在一切准备就绪!您可以通过 FoxyProxy 使用 RapidProxy 进行安全、稳定且高效的浏览。
### **步骤 4:开始使用代理**
返回 FoxyProxy 扩展程序的主界面。
点击您刚刚创建的代理配置文件,然后选择 **【Location/位置】** 以激活已配置的代理环境。
现在一切准备就绪!您可以通过 FoxyProxy 使用 RapidProxy 进行安全、稳定且高效的浏览。