> For the complete documentation index, see [llms.txt](https://docs.rapidproxy.io/llms.txt). Markdown versions of documentation pages are available by appending `.md` to page URLs; this page is available as [Markdown](https://docs.rapidproxy.io/proxies/integration-guide/dynamic-residential-proxies/bitbrowser.md).
# Bitbrowser
### **Step 1: Log into Your Account**
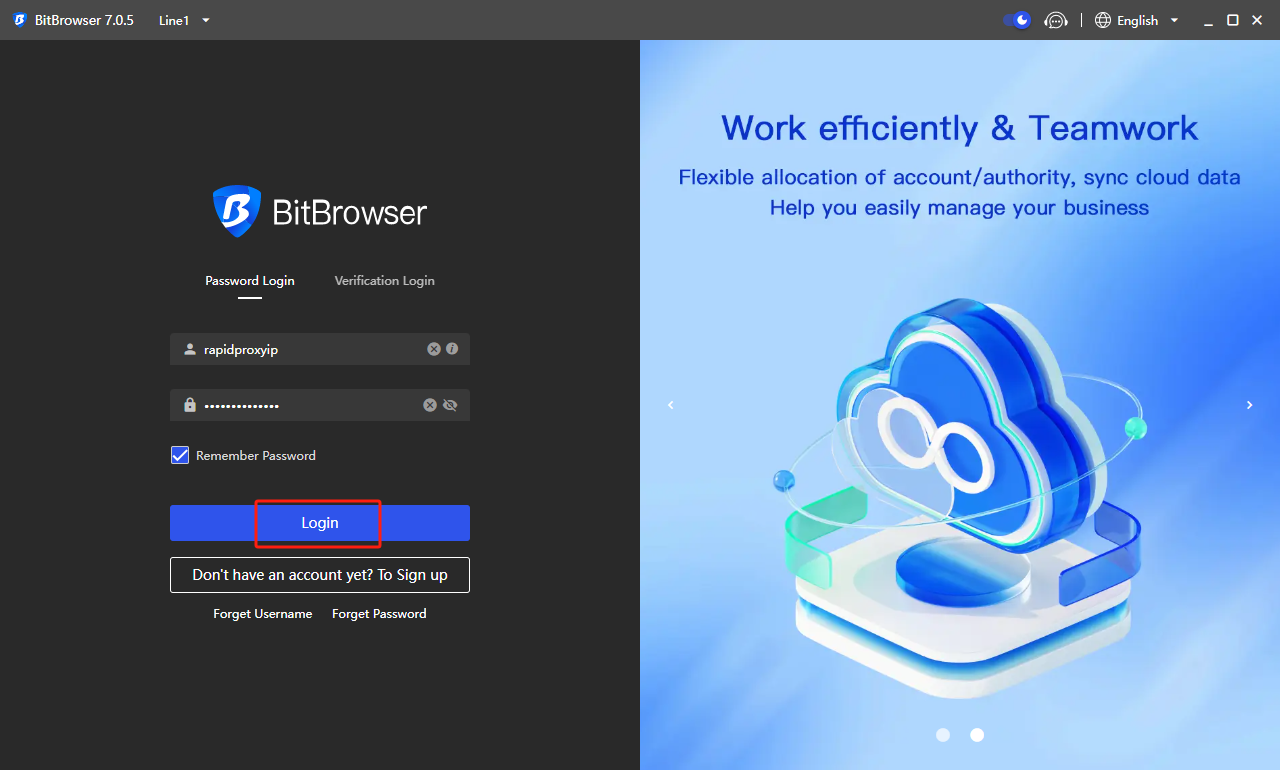
Launch the BitBrowser application and click **【Login】** to access your account.
### **Step 2: Create a New Proxy Profile**
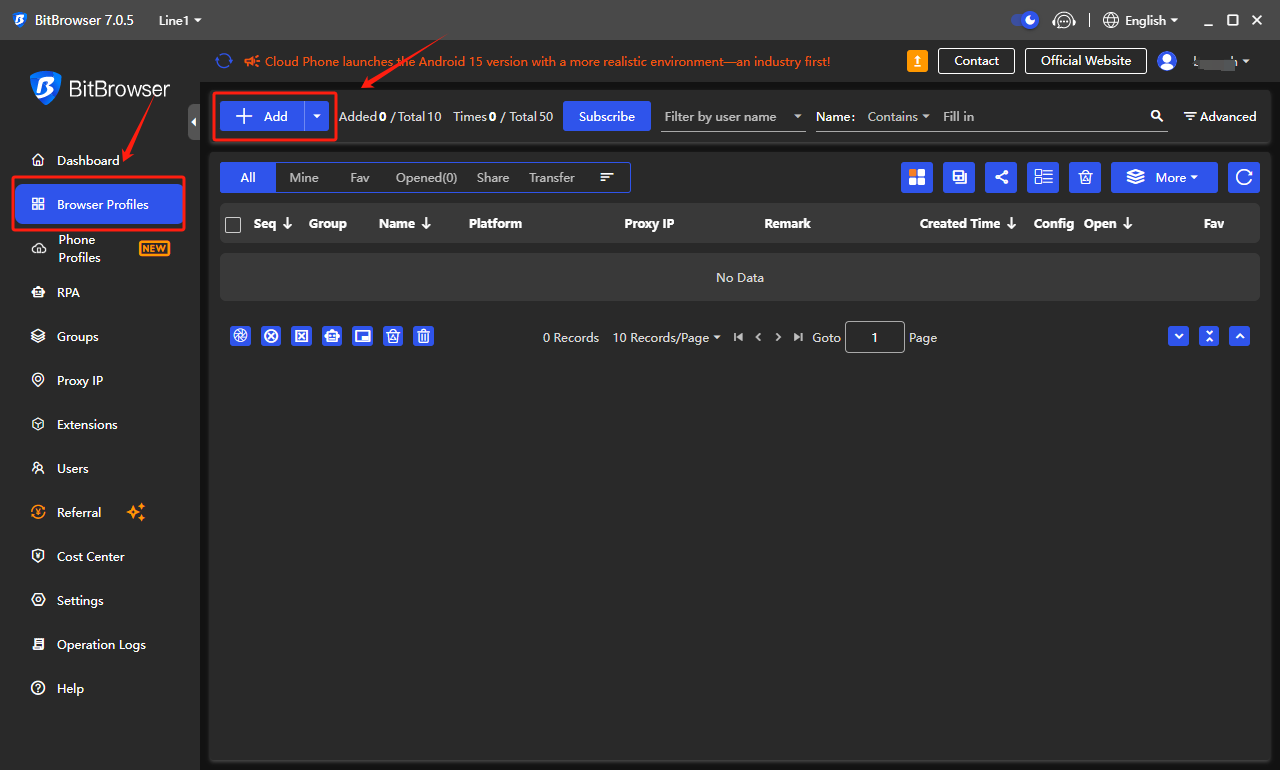
Navigate to the **【Browser Profiles】** section and click **【+Add】** to create a new browser profile for your proxy setup.
### **Step 3: Enter Proxy Details**
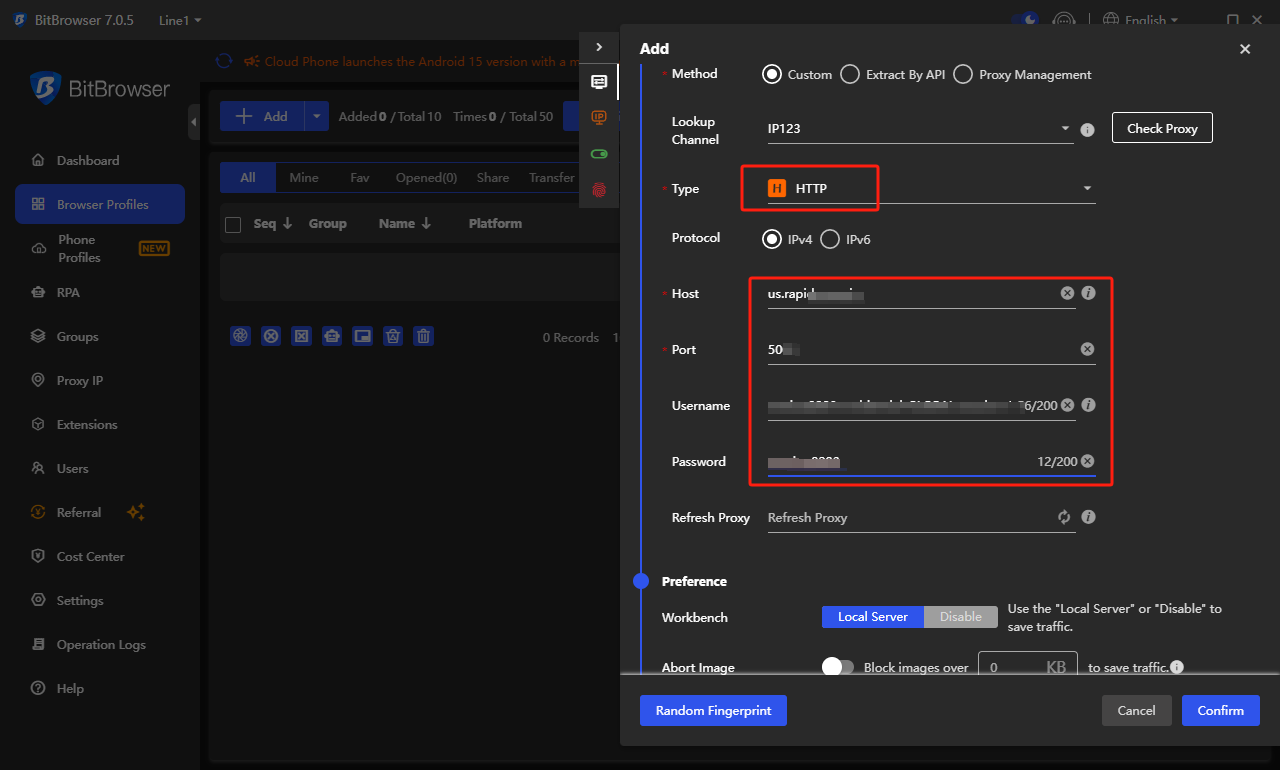
* In the **Proxy Type** dropdown, select **【HTTP】**.
* Copy the proxy information provided by Rapidproxy (including IP address, Port, Username, and Password) and paste it into the corresponding fields in BitBrowser.
**Note:** This guide uses **HTTP** as an example. Rapidproxy supports **HTTP(S)** and **SOCKS5** protocols.
[How to Get Residential Proxies by APl?](/proxies/dynamic-residential-proxy/get-proxy/api/get-proxy-via-api-method.md)
[How to Get Residential Proxies by User & Pass Auth?](/proxies/dynamic-residential-proxy/get-proxy/user-and-pass-auth/configuring-residential-proxies.md)
### **Step 4: Test the Proxy Connection**
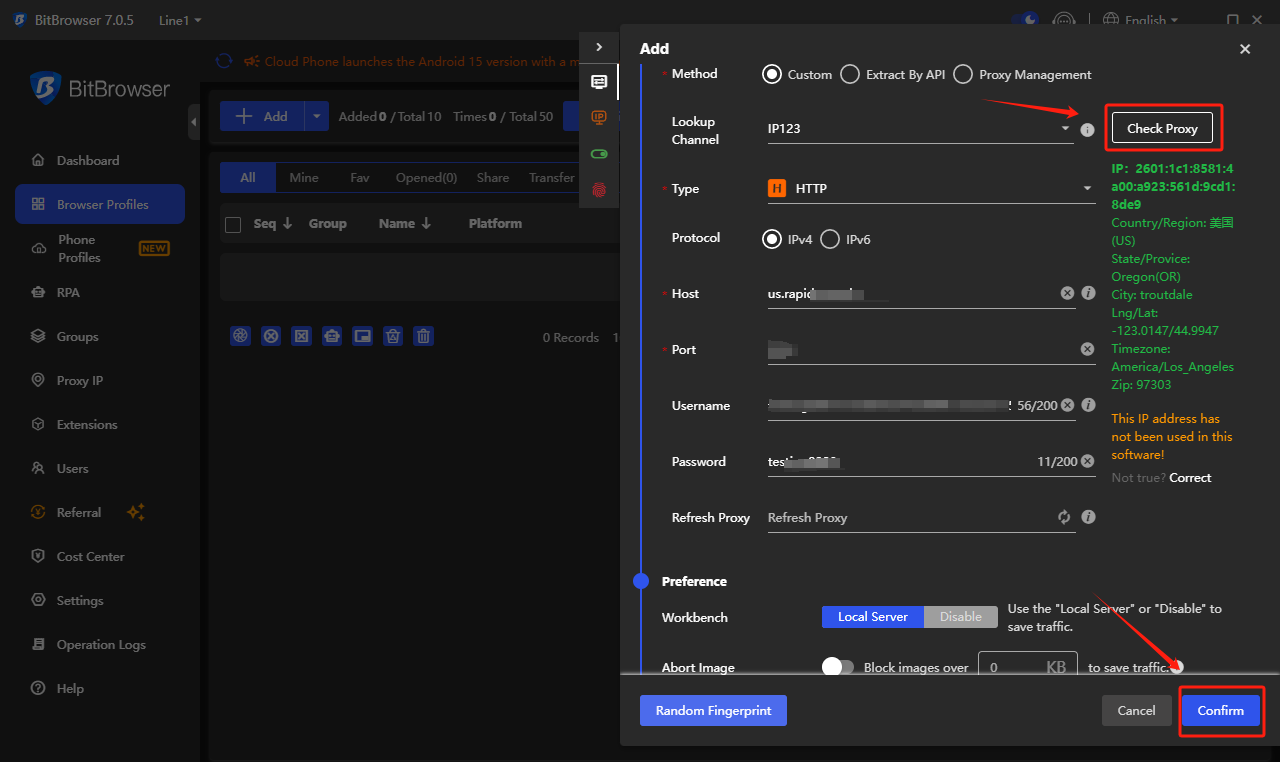
After filling in the proxy details, click **【Check Proxy】** to test the connection.\
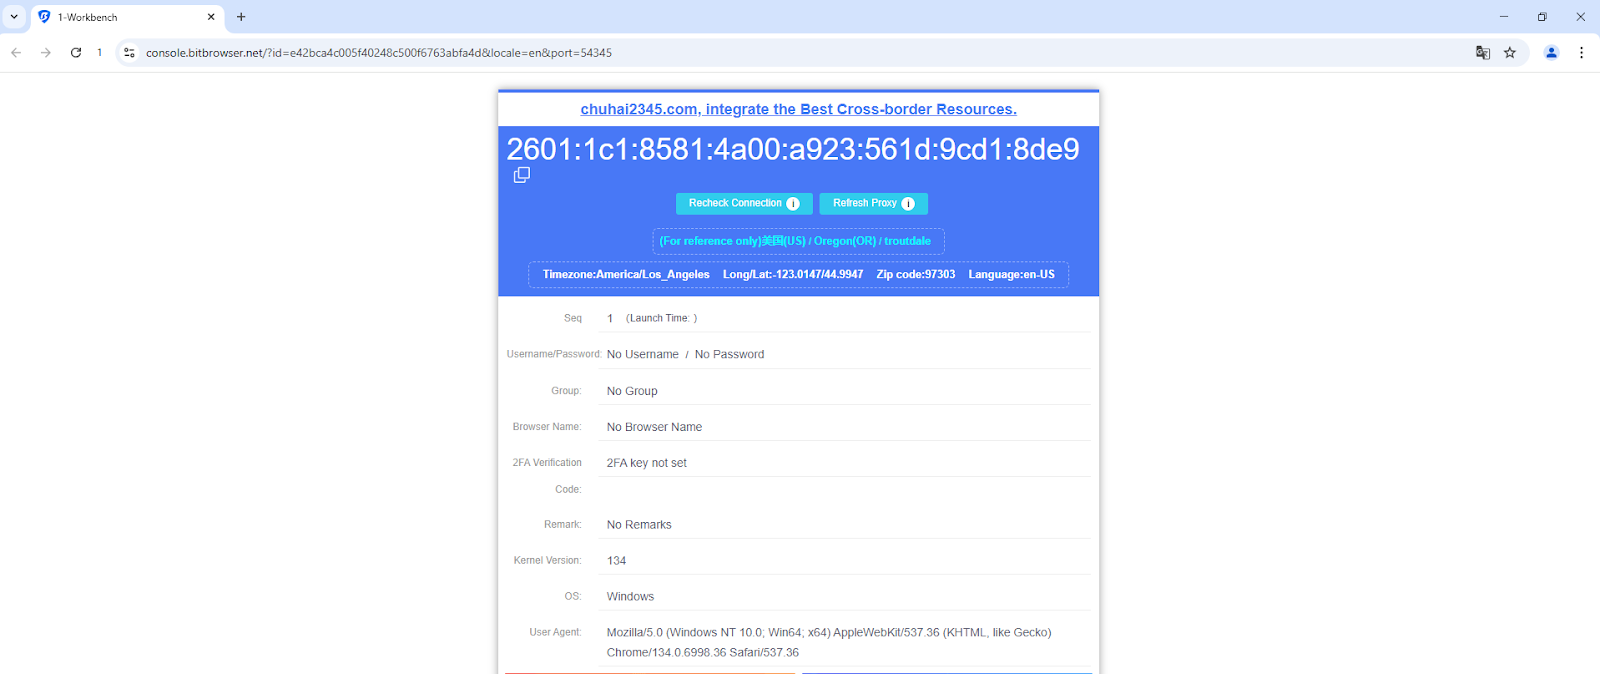
If the connection is successful, you will see detailed proxy information. At this point, your proxy has been set up correctly. Click **【Confirm】** to save the profile.
### **Step 5: Start Using the Proxy**
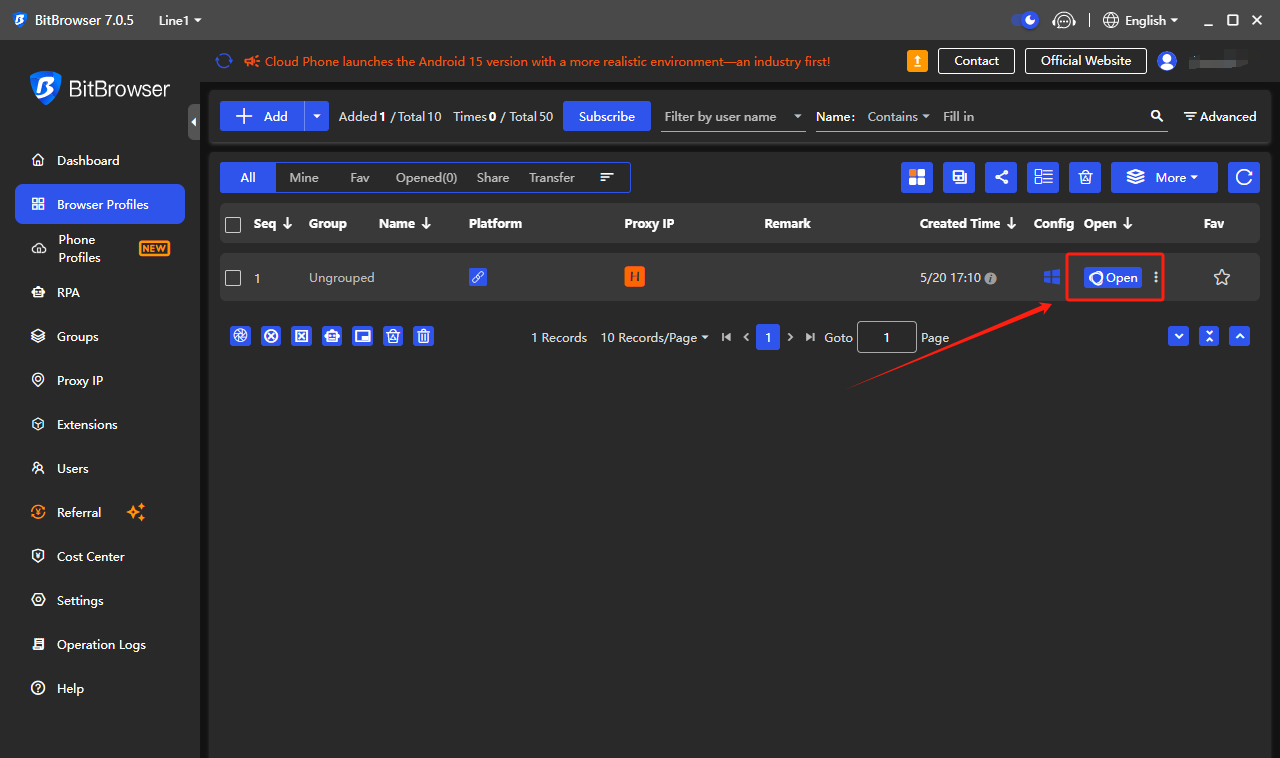
Return to the **【Browser Profiles】** page. Locate the profile you just created and click **【Open】**to launch a browser environment with the configured proxy.
You are now ready to perform secure, stable operations in BitBrowser using Rapidproxy.